When it comes to discussing non-linear capabilities, non-convergence error messages are the most common stumbling block. A non-linearity, in other terms, a change in the stiffness matrix as the calculation is performed, can be due to yielding (plasticity), deformation of the structure (eg. tension on a fishing rod) or to a contact status change.
When using an implicit scheme it is generally not possible to predict beforehand where the stiffness of the structure is heading, so extra care should be taken when setting up the model.
Focusing on contact, one of the main difficulties encountered when performing non-linear analyses is in detecting a change in status of the contact.
In the finite element model the contact definitions are treated as springs which are internally created between the contacting surfaces to achieve the desired contact behaviour. These springs are included in the overall stiffness matrix.
So
Fc = Kc . Xp
Fc: contact force
Kc: contact stiffness
Xp: penetration distance
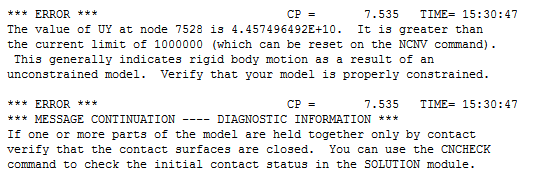
As an example, consider a case where contact has not been established due to initial gaps in the CAD file. The gap means that Xp will be zero and the resulting contact forces (Fc) will be zero. This produces a force imbalance and as inertial effects are not considered in a static analysis the nodes in the body will exhibit infinite velocities. A typical error message from the solver output is below:
The Initial Information table in the Contact Tool will highlight the offending contact definitions. Reviewing this information before solving the model is good practice and can save a lot of solving and debugging time. In this case the problem is an initial gap of 0.14204mm which has resulted in now contacting elements at the start of the solution.
One approach to solving this problem would be to define an initial load step in which a displacement is applied to the under-constrained body in order to establish contact for subsequent load steps in which the service loads are applied. This displacement could then be deactivated as the model would be stabilised.
Though this approach will work, it would require additional user effort to set up and test an additional load step which is not a desired part of the analysis result.
To alleviate this problem ANSYS has released a new feature since R14 called contact damping.
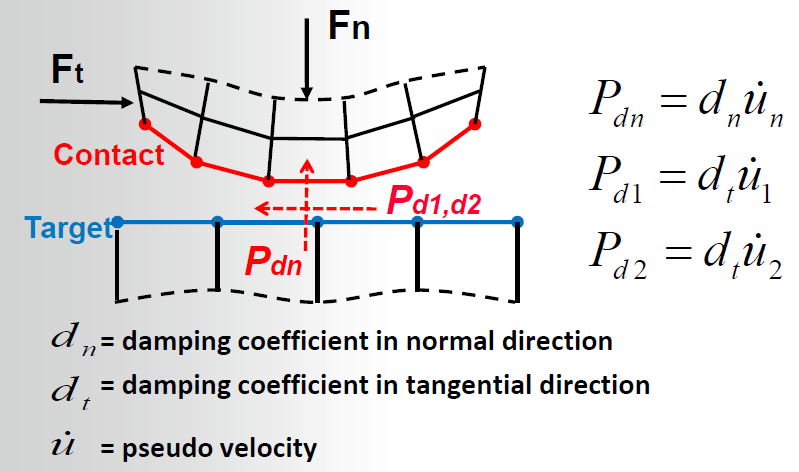
As the contact is not detected, the gap increases at a pseudo-velocity between two substeps, a damping force is computed to prevent it from flying away. The damping coefficients are calculated as a function of the opening gap and pinball radius.
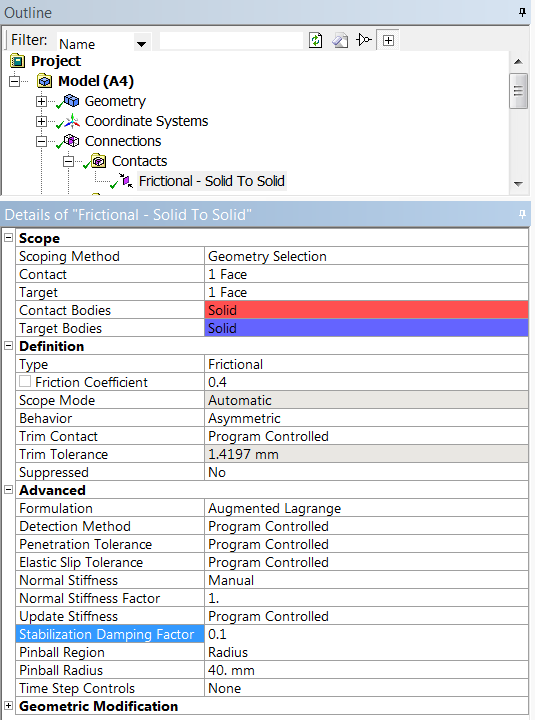
This option is found in the Advanced section in the Details window for the contact of interest.
The important step now is to define the stabilisation damping factor.
What value should I use? What damping force is acceptable? How can I check my results?
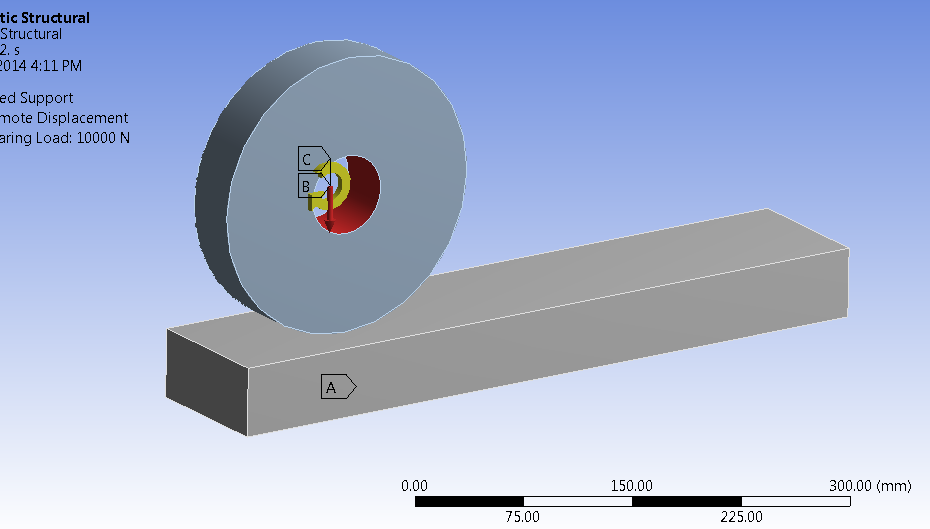
This is illustrated with a simple rolling contact test.
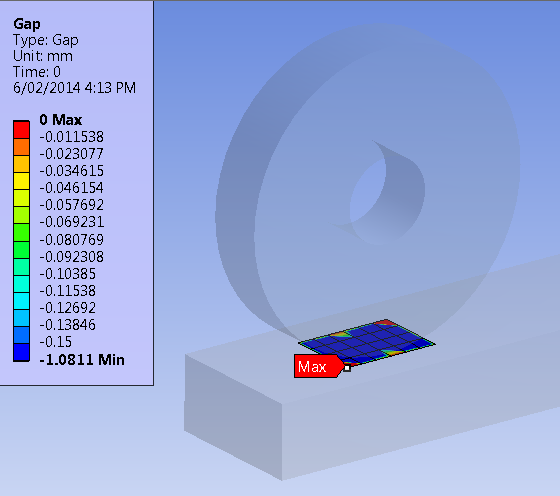
The Gap contour plot in the Contact Tool shows that the separation between the contact elements is up to 1mm.
As a first step (LS1 = 1s) a simple bearing load is applied and it is expected that the contact will be initiated, then a rotation of 45’ is applied which is expected to result in translation due to the friction coefficient of 0.4 (LS2 = 2s).
To retrieve the Energy Solution (/POST26 ENERSOL in the Mechanical APDL interface) a Solution APDL snippet was used to automatically write it to a text file in the project user_file.
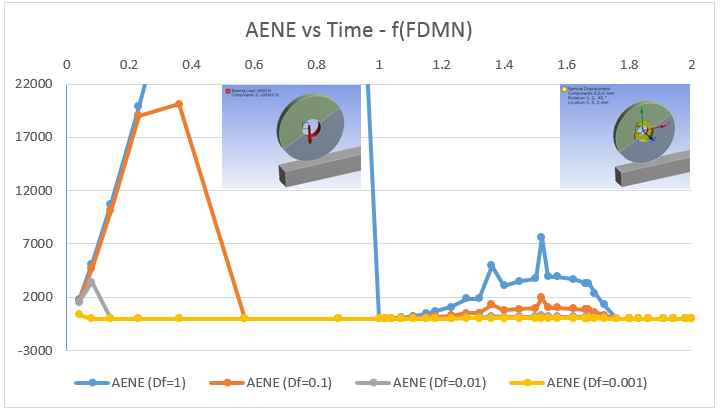
To determine the effect of the damping factor four solutions were produced with the damping factor varying from 1 to 0.001.
Artificial energy due to contact stabilisation
This plot shows the Artificial Energy created by the contact damping to ease the initiation process. The number of iterations required to solve the model varied from 189 to 211 from lowest to highest damping ratio.
The damping force is directly proportional to the damping ratio specified by the user (default =1).
It also depends on the displacement over the time of the current substep and the contact pinball radius.
dn: normal direction damping coefficient
FDMN: normal direction stabilisation damping factor (default=1.0)
PINB, Upinb: pinball radius
Un: normal direction contact gap
If the damping ratio is very large the force involved can be too high, hence it can become more difficult to converge. This is illustrated by the number of iterations required.
In this particular case the damping force is only required to stabilise the model and prevent the wheel from flying away, so a smaller damping factor, for example, 0.01 can do the job very well.
Another advantage of this method is that the effect implied by the formulae is temporary. As the contact is initiated the structure stabilises itself and the damping forces eventually fade away entirely.
During the second load step, a surge in the damping force appears and is amplified along with the FDMN value. The reason is that damping is valid for both the normal and tangential contact direction.
dt: tangential direction damping coefficient
FDMN: normal direction stabilisation scaling factor (default=1.0)
FDMT: tangential direction stabilisation scaling factor (default=0.001)
PINB, Upinb: pinball radius
Un: normal direction contact gap
This tangential damping uses the previously defined normal damping factor (FDMN) weighted by the tangential direction damping factor (FDMT) providing a stabilisation effect in this direction.
That looks just great, now I can apply moment loads without fear instead of using the rotation method outlined above.
Artificial energy due to contact stabilisation / stiffness energy
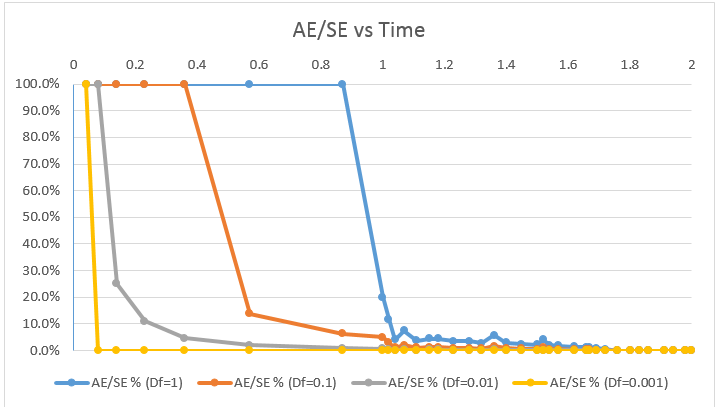
This plot of artificial energy due to stabilisation / element stiffness energy shows that the artificial energy dominates at the beginning of the solution but gradually becomes insignificant as the solution stabilises and the realistic effects take over.
Both of the approaches explored here will give a good solution for this particular problem however there will be scenarios in which the initial displacement approach will not be appropriate or will be inconvenient due to other features of the model. Contact stabilisation provides a simplified method for achieving a solution for a model containing contact non-linearities. Setting up a model shouldn’t be an art or some kind of black magic and it is good to see that recent feature enhancements in ANSYS have recognised the need to simplify this process.

